
What You'll Build
A self-running sequence controller. A Clock creates repeating events, a Counter keeps track of them, the TM1638 display shows the current count, and Compare blocks turn TM1638 LEDs on at selected points in the sequence. Press a TM1638 key to reset the Counter and start again.
What You'll Need
- DALE with ESP32-S3
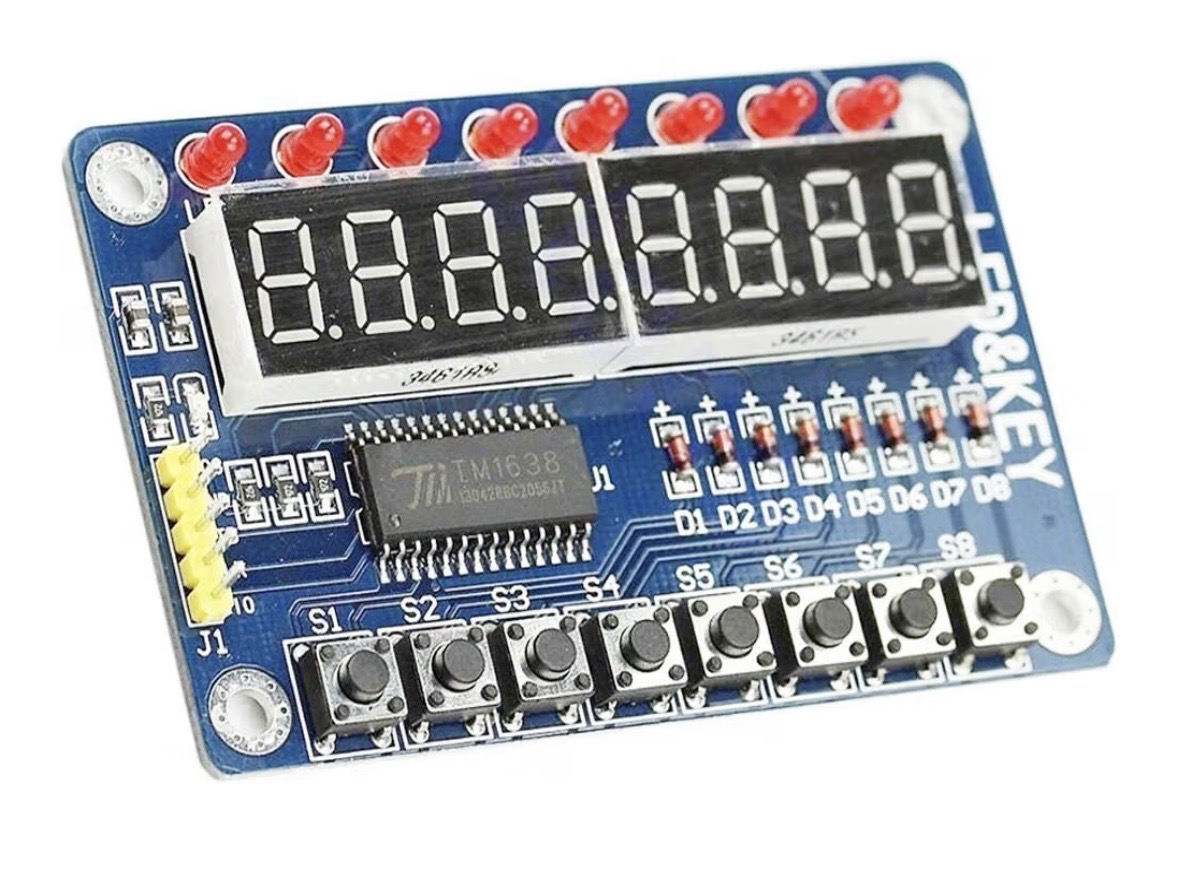
- TM1638 module
What You'll Learn
- How a Clock creates repeating events.
- How a Counter remembers how many events have occurred.
- How a Compare block can recognize a particular count.
- How to display changing numeric data on the TM1638 display.
- How one count can control physical TM1638 LEDs.
- How a physical TM1638 key can reset a running sequence.
Connect It
Use the same TM1638 module you used in the earlier experiments. Connect it using the TM1638 configuration already established in DALE.
No loose LEDs, resistors or pushbuttons are required for this experiment.
Try the Module First
Before building the sequence, open DALE's TM1638 tools and verify that the display, LEDs and keys respond correctly. This separates the hardware test from the logic you are about to build.
Build It in Logic Builder
Add a Clock and connect it to a Counter. Send the Counter's numeric value to a TM1638 Display (TM Display) block so you can watch the count change in real time.
Add Number constants and Compare blocks for a few selected counts. Connect those Compare results to different TM1638 LED (TM LED) blocks. As the Counter reaches each selected number, the corresponding TM1638 LED responds.
Finally, add a TM1638 Key (TM Key) block and connect it to the Counter's external RESET input.
Start with a slow Clock—about one event per second—so you can clearly watch the sequence advance. Press the selected TM1638 key at any point and confirm that the Counter returns to its starting value.
Run It
Start the Logic Builder runtime. Watch the TM1638 display count upward and observe the TM1638 LEDs respond at the values you selected. Then press your reset key and watch the entire sequence begin again.
What Just Happened?
The Clock created events without waiting for you. The Counter remembered how many events occurred. The TM1638 display made that stored value visible. Compare blocks asked questions such as “Has the count reached this number?” and turned those answers into physical LED activity. The TM1638 key gave you a real hardware control that could change the state of the running system by resetting the Counter.
This is sequential logic: what the system does now depends not only on its inputs, but also on what happened before.
BUILD IT VISUALLY. SEE THE REAL CODE.
Show Me The Code
Generate the Arduino sketch and follow the same path you built visually: Clock timing → Counter update → numeric display → comparisons → TM1638 LEDs → reset input. Look for the readable Clock, Counter, Compare, TM1638 Display, TM1638 LED and TM1638 Key variables. The code is the textual version of the sequence you just watched operate on real hardware.